This section discusses the Edit+ WYSIWYG toolbar in detail.
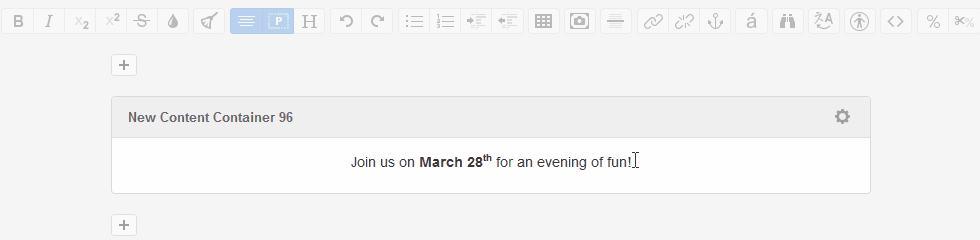
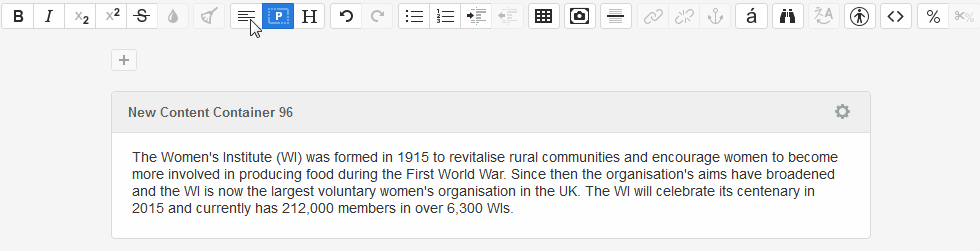
The toolbar below is interactive, click a button to be taken to an explanation of the feature.


The WYSIWYG editor allows you to apply basic styling to your text. You can make text, Bold , Italic or Strikethrough .
You can apply multiple styles to text if necessary.
To apply basic formatting to your text simply highlight the text you'd like to style, and then click the relevant icons in the editing toolbar.
Making Text Subscript or Superscript
You can also make your text subscriptor make your text Superscript , again simply select the text you'd like to style and then click on the relevant button in the toolbar.
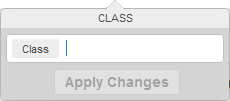
Applying a Class to Content
The class button is used when adding image galleries into pages.
Although you can simply de-select options individually from the toolbar if you've applied various different text formatting options to the text on your page, you can also just click the Remove Format button. This will strip all formatting from your text.
This can also be useful if you are copying and pasting text from MS Word.
Justification (Aligning to Left, Right, Centre and Block)
Just like with MS Word you can specify where you'd like text to be aligned on your page. By default text is aligned to the left.
You can also align to the centre of the page.
Or the right.
Or "Block" which gives each line an equal width (like in newspapers and magazines)
The formatting button is generally not needed. It can be useful for adding quotes to your pages.
Adding a Heading
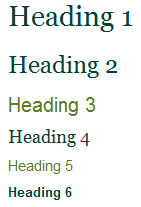
Headings are important both for people and search engines. HTML specifies 6 variations of header, ranging from H1 (used once, for the title of the page/article) through to H6.
Headings on the WI website have all already been styled, and will look like this when use on pages:
Undo and Redo actions
If you accidentally delete some text from a page you're working on or move an image you can easily rectify it using the Undo tool. If you realise you did want to make that change after all you can also use the Redo tool.
Creating Ordered and Unordered Lists
You will notice two buttons to insert a list. You can insert ordered lists and unordered lists.
An ordered list has numbers:
- Point one
- Point two
- Point three
An unordered list has bullet points:
- Point one
- Point two
- Point three
Indenting and Outdenting Lists
If necessary you can indent list items with the Indent list button, or remove the indentations with the Outdent list button
- Fruit
- Apples
- Bananas
- Pears
- Oranges
- Vegetables
- Potatoes
- Carrots
- Courgettes
Creating and Editing Tables
Tables are discussed in the tables section.
Inserting an Image
Images are discussed in the images section.
Inserting a Horizontal Rule
The horizontal rule tag "defines a thematic break in an HTML page (e.g. a shift of topic)", a horizontal line will be inserted into your content.
Adding and Removing Links
Links can be added using the linked chain icon and removed using the broken chain link. Links are covered in detail in the linking chapter.
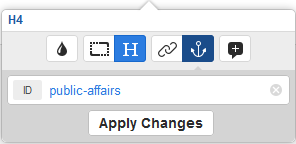
Adding an Anchor ID
Anchors are a useful way of allowing visitors to quickly navigate to the content they need on pages containing a lot of information.
If you have used links in Matrix so far you have probably linked to separate pages, but you can also link to content on the same page.
This page is using anchors, clicking on one of the images in the toolbar takes you down the page to the relevant heading so you can read about the feature in more detail.
It's easy to set up an anchor but it does involve two steps.
Firstly, select the text you'd link your link to anchor to. Generally this will be a heading - anchor names cannot contain spaces, but you can use hyphens.
Secondly, you need to decide what will be linking to your newly created anchor - it can be either text or an image. Select the item and click the link icon.
Type the name of your anchor, with # before it in the URL box.
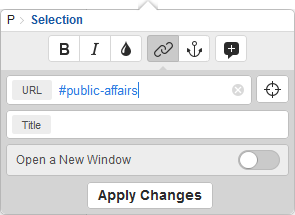
You can have multiple links to one anchor on a page, but an anchor itself is unique and can only be used once on a page.
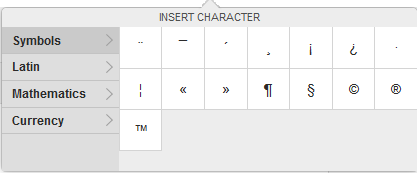
Inserting Symbols
The symbols button allows you to insert characters not found on your keyboard. Useful if you need to talk about a Crème brûlée, for example.
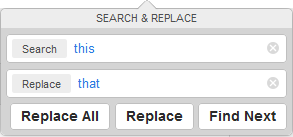
Searching and Replacing Content
The Search & Replace tool will search for specific text on your page, you can also automatically replace all instances of your search term with some new text.
For example all instances of "Stephen" could be changed to "Steven" without you having to scan through and make the changes yourself.
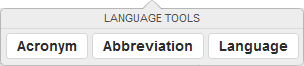
The Language Tools icon allows you to define acronyms and abbreviations. ANC , HTML , etc.
The Accessibility Auditor
The accessibility auditor will run through your page and offer any suggestions that would improve the accessibility.
Missing ALT tags on images for example might cause problems for visually impaired visitors.

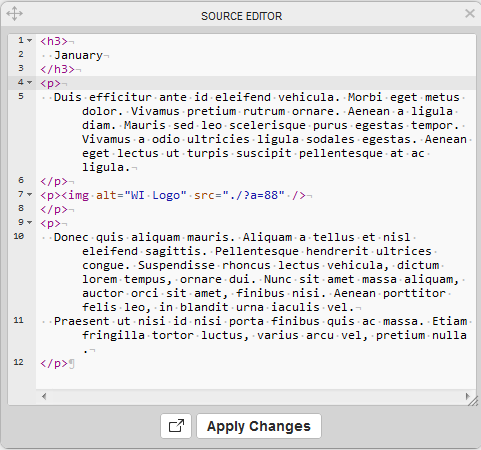
Viewing / Editing the HTML Source
Strictly for advanced users, if you need to make any amendments to the source code you can do so here.
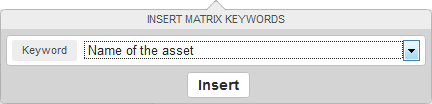
Using Matrix Keywords
Matrix has an assortment of "keywords" that can be inserted into pages.
To use it you simply click the icon, you are then presented with a drop-down list of options. Select the keyword that matches your need and press insert.
a %keyword% will then be inserted into your page. When you switch to Preview mode the keyword will transform.
The majority of keywords are unlikely to be of much use to most editors, but you might want to, for example display the date a page was last updated (possibly useful if you are creating a blog or a newsletter), and the author of the last update.
In Edit Mode, with our keywords added it would look like this:

In Preview Mode/on the Live website it would be automatically transformed into this:
