If you are using images or photos taken by someone else, make sure you have permission from the person who owns the copyright. Most images or photos you find on the internet or in picture databases have licenses and copyright attached to them. You could incur large costs for your WI or federation if used without permission or incorrectly.
You can use stock images instead, which are photographs that are licensed for use by organisations.
You can browse free stock images
here.
It's always a good idea to upload images that are an appropriate size for use online.
An image straight from a digital camera can be unnecessarily large. It's important to remember that over 60% of visitors to the WI website are using a mobile device. This means they might have a slower internet connection that computer users, and they might have a limited data allowance. Other visitors might be in a rural location without high speed internet.
As a general rule images should be no wider than 850px. The ideal aspect ratio for the website is 16:9 (i.e. 800x450px, 1024x576px or 560x315px would all work).

If you would like to have multiple images next to each other you should halve those dimensions (two images at 400px = 800px)

You can re-size images on your computer before uploading them to the website.
Personally I recommend IrfanView, which is a small, free and very powerful image viewing and re-sizing tool.
If you'd prefer not to install any additional software you might want to try Adobe Express.
We can add images into Matrix in a number of different ways.
- Using the WYSIWYG toolbar - Easy
- Dragging & Dropping from your computer - Easiest
- Using the Asset Creation Wizard
Using the WYSIWYG toolbar
- Navigate to the page you'd like to insert an image in to.
- Click inside the Content Container you'd like to insert the image into. You should see a cursor in the box and the WYSIWYG toolbar should be "active" (clickable).
- Click on the Insert Image icon (a square with a camera in the middle of it)

- The Insert Image pop-up box should now appear:

- Click "Upload" and select the file you would like to upload from your computer. Note that only one image can be uploaded at a time.
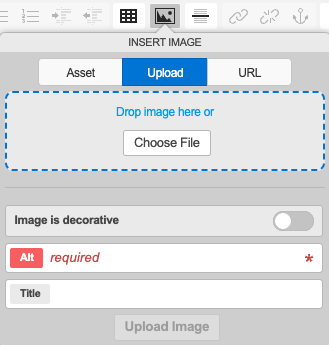
- Ensure that the Alt information is filled out (Remember: Alt is short for alternative text, and should be a text description of the image)
- Click on the "Upload Image" button at the bottom of the screen. After a few seconds the image should appear in the page.
Using the 'New' Button
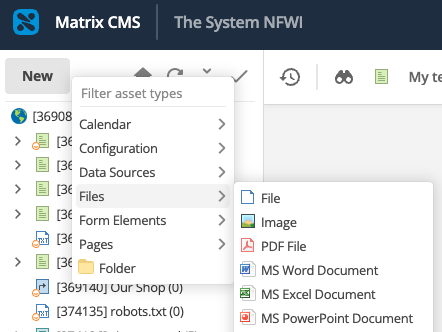
- In the Admin interface, click on the
 button in the screen header at the top of the page.
 - Hover your cursor over the "File" category and then select the "Image" option.
- Click on the asset you would like the image to live under (this can be a folder, or you can create it directly under the page on which you want to use the image) and click "Create here".

- The Image Creation Wizard will pop up:
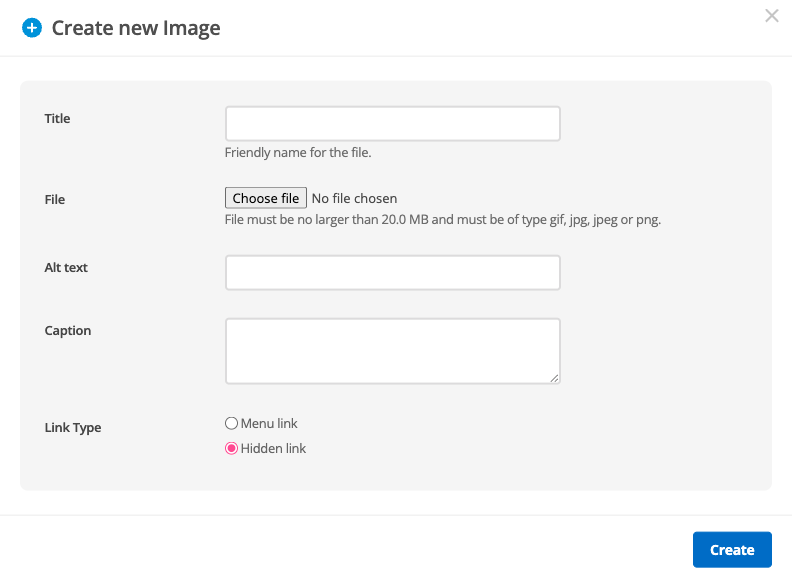
- Click "Choose file" to select the image you'd like to upload from your computer.
- You do not need to give the image a title - the system will automatically use the existing file name. However, if you want to rename the file to something more friendly, you can do that here.
- Enter Alt Text for the image (Alt text provides a text alternative if the image can not be displayed). If an image is decorative, it does not need a description.
- Change Link Type to "Hidden link".
- Click the "Create" button.
- You will then hopefully see a pop up saying "Asset created successfully".
- Using the Asset Tree, navigate to the page you'd like to insert the image in to.
- Click inside the Content Container you'd like to insert the image in.
- Click on the Insert Image icon in the toolbar
- The Insert Image pop-up box should now appear:
- Click on the crosshair
 and select the image from the Asset Tree by right-clicking the asset and clicking "Use me".
 - Click Apply Changes
- The image should then appear within your content container.