Aside from text and images you might also want to upload documents to your website that your visitors can download.
The types of files you are likely to upload are:
- PDFs (Adobe PDFs)
- DOC/DOCX (Microsoft Word)
- XLS/XLSX (Microsoft Excel)
- PPTX (Microsoft PowerPoint)
Remember that visitors will have different software installed, and a lot are likely to be visiting from mobile phones and tablets, so it's a good idea to stick to common file formats such as those listed above.
- In the Admin interface, click on the
 button in the screen header at the top of the page.
 - Hover your cursor over the "File" category and then select the type of file you would like to upload (in this example we will be uploading a PDF but the process is the same for all file types).
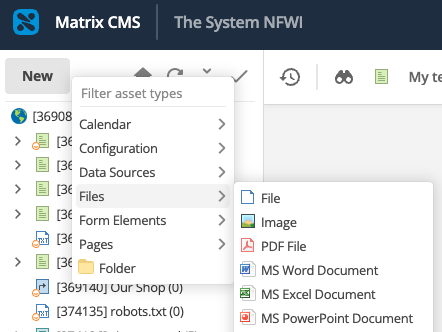
- Click on the asset you would like the file to live under (this can be a folder, or you can create it directly under the page on which you want to use the file) and click "Create here".

- The Asset Creation Wizard will pop up:
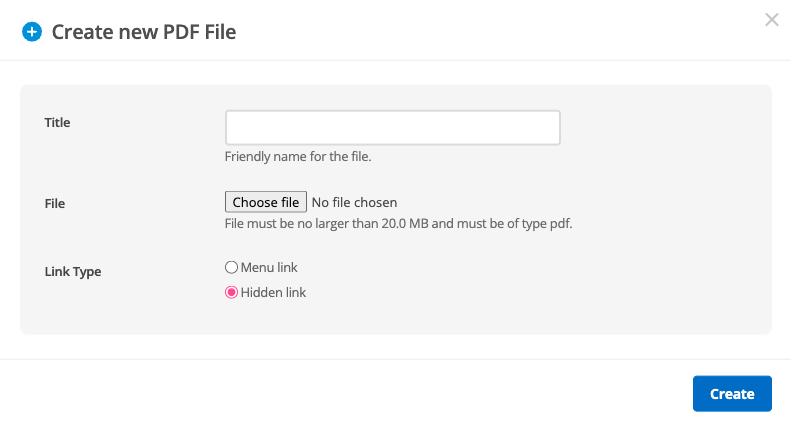
- Click "Choose file" to select the file you'd like to upload from your computer.
- You do not need to give the file a title - the system will automatically use the existing file name. However, if you want to rename the file to something more friendly, you can do that here.
- Change Link Type to "Hidden link".
- Click the "Create" button.
- You will then hopefully see a pop up saying "Asset created successfully".
- The "Linking" chapter covers how to link to your newly uploaded document(s) from within your pages.